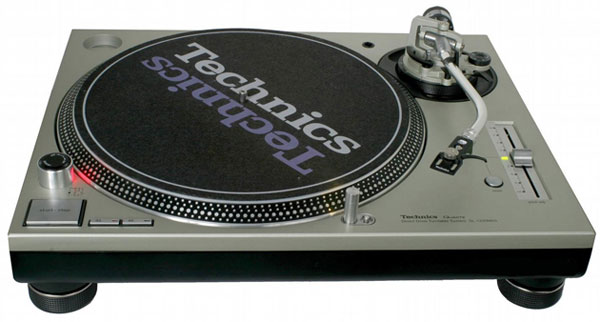
Technics SL-1200
RCA Cable Problems
RCA cable problems are relatively common with Technics SL-1200 turntables. Despite being the first name in DJ turntables for more than a quarter century, 1200s are renown for having shoddy factory RCA cables. Problems with the plug ends and shorts along the cable’s length occur frequently. Thankfully, replacing your old RCA cables with new, better ones isn’t really that hard.
What You’ll Need
To replace the RCA cables on a Technics SL-1200 you’ll need the following: a Phillips screwdriver, a flathead screwdriver, a sharp blade or wire strippers, a soldering iron, solder, and a pair of new RCA cables.
Step 1: Getting Started
Before you do anything, unplug your turntable. Then strip it of the stylus, tone arm weight, 45 plug, slip mat and platter. The platter should twist off easily enough, but if it’s stubborn, try giving the center spindle a little tap with a screwdriver handle to loosen it.
Make sure the tone arm is secure before flipping your turntable over to begin working. To avoid bending the tone arm, find an old cushion to rest your upside down turntable on.
Step 2: Removing the Base
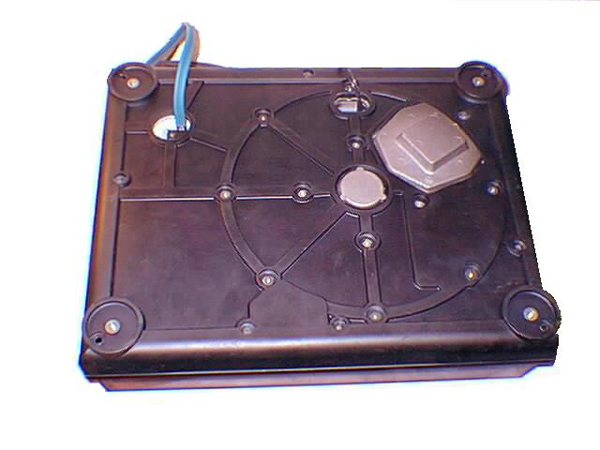
With the unit upside down, begin by unscrewing the four rubber feet by hand.
Now you’re going to need to unscrew the 23 screws that attach the rubber base. But before you do this, take note that there are three different types of screws holding the base in place.
Underneath the four rubber feet you’ll see one type of screw. Then along the outer edge of the turntable, you’ll find there are five of another type of screw and around the center of the platter’s radius there are two circles comprised of 12 of yet another type of screw.
Keep the different types of screws separate from one another as you remove them.
Once you’ve removed the screws, peel the rubber base off. If your turntable is a few years old, the base may be harder to peel off. If this is the case, gently insert a flathead screwdriver between the base and the unit and give the base a little tap to loosen it. Slip the base off and set it aside.
Step 3: Accessing the Circuit Board
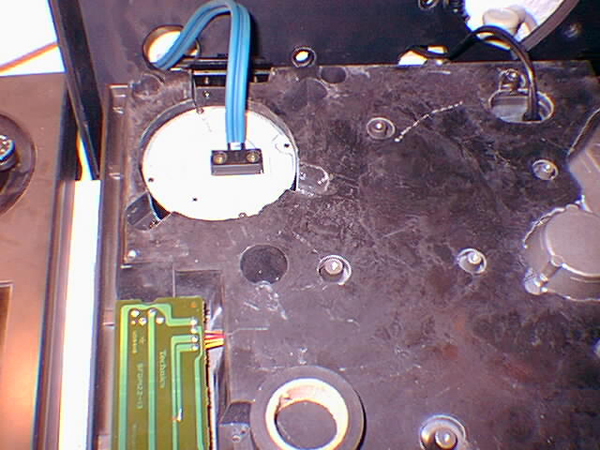
Now that you have access to the underside of the unit, you can unscrew the two screws holding the clip, which secures the old RCA cables, in place.
Once you’ve unscrewed the clip use your flathead screwdriver to unclasp it from the RCA cables and ground wire. Clip it back together and set it aside.
Then unscrew the two screws securing the round metal plate that protects the underside of the tone arm’s inner workings. Carefully pull it up and off.
You now have access to the circuit board that the RCA cables are attached to.
Step 4: Removing Your Old Cables
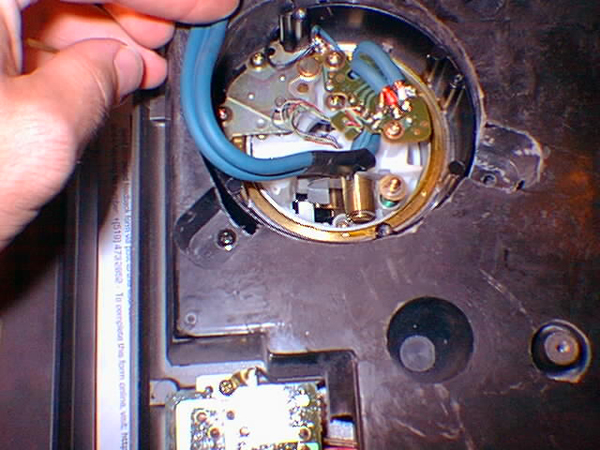
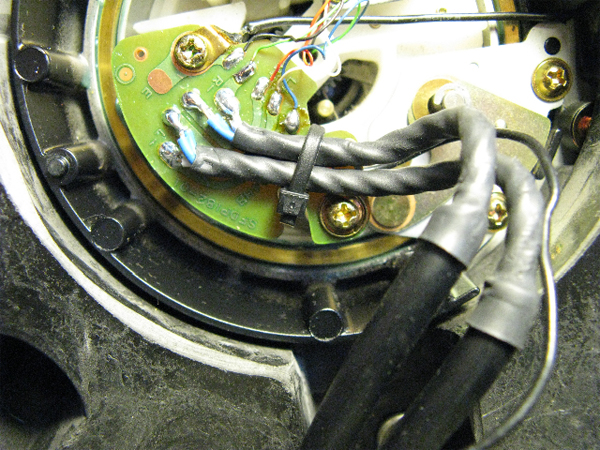
Your RCA cables will be held down by a zip tie and soldered to the circuit board itself.
To remove them you’ll first need to cut the zip tie that holds them down. However, when doing this, be careful not to damage any of the smaller wires adjacent to the RCA cables. If you can, gently push these wires aside before cutting the zip tie and removing it.
Now you’ll need to use your hot soldering iron to remove the old RCA cables.
To do this, touch the hot element to the solder holding the cables in place, while gently pulling on the cables.
Don’t apply too much pressure or force it. Just little touches with the element and gentle pulling on the cables until they separate from the circuit board.
Step 5: Preparing Your New Cables
You can buy special RCA cables intended for Technics 1200s. But you can just as easily buy a pair of good, quality RCA cables and cut them to the appropriate length.
To prepare your new RCA cables, use a sharp knife or wire strippers to trim an inch of the sleeve off both cables. When you’ve exposed the loose wires inside, separate them from the inner sleeved cable and tie them off together.
Now use your wire strippers to carefully strip the sleeve off the inner cable. Twist the inner wires together as well.
Use the soldering iron again to tin, or coat both twisted wire ends on your new cables with solder.
Step 6: Attaching Your New Cables
Once the ends of both wires are tinned, set them at the appropriate points on the circuit board and hold them there. Use the soldering element to melt the solder onto the connection point until your cable sticks to it. When soldering, take care not to melt the rubber sleeve on the inner cable.
Let the solder dry before continuing.
With your new RCA cables soldered into place you can replace the zip tie.
Bend your new zip tie and slip it under the circuit board so it comes back up and around. Thread it through itself and cut off the excess.
Step 7: Putting it Back Together
Now retrace your steps.
First slide the round metal plate back over your cables and screw it down on top of the tone arm circuitry.
Next replace the clip that holds the RCA cables and ground wire together. Often better quality RCA cables are thicker than the factory cables on an SL-1200. You may find it harder to replace the clip than it was to remove it. Don’t panic, it just may take a little more effort to get the new RCA cables into the clip.
Once the clip is in place, secure it with the screws and replace the rubber base.
With the rubber base in place, go ahead and screw it down, taking care to use the appropriate type of screw in the appropriate place.
Reattach the four rubber feet, flip your turntable over and replace the platter, 45 plug, tone arm weight, stylus and slip mat.
Congratulations, you are finished and you can now reconnect your turntable to your mixer and plug it in.


